What is a Windows Easy Transfer Cable
What is Windows Easy Transfer?
Transferring large data files or folders is always a head-aching problem no matter which system you're using. Microsoft had launched a program called Windows Easy Transfer to help users to transfer files and settings from an older version of Windows OS to a newer one.
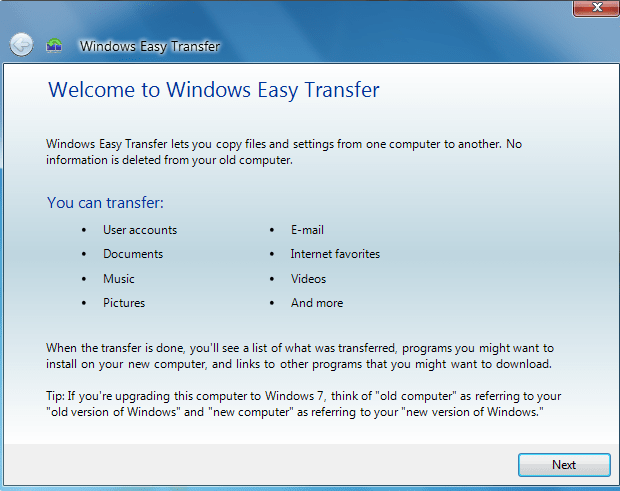
Windows Easy Transfer debuted in Windows Vista and is now available in Windows 7, Windows 8, and Windows 8.1 to provide limited migration capabilities-- it does not transfer apps for any version of Windows, users could only move files and settings.
There are some limitations of this program:
• Users can't transfer files from a 64-bit system to a 32-bit system.
• Windows Easy Transfer in Windows 8.1 can only transfer settings from Windows 7, Windows 8 computer, settings from Windows Vista, or another Windows 8.1 PC are not supported.
• Transfers using a USB flash drive are the only methods enabled in Windows 8.1; transfers via an Easy Transfer Cable or a network connection are both unavailable.
Windows Easy Transfer has become history because it's stopped in Windows 10. Thus, for Windows 11 users, you'll need to look for new easy transfer software for Windows 11.
[Free] Windows 11 easy transfer software
To meet all needs of moving large files, folders, and programs, or even OS, third-party software will be more practical for users. AOMEI Partition Assistant Standard is the most recommended Windows easy transfer for Windows 11, which can clone disk or a specific partition. All data files and installed programs will be copied to the destination disk, and the moved programs no need to reinstall, they can run smoothly as before on the new disk.
Notes:
1. If the source disk has OS on it, don't forget to change the boot order after the cloning.
2. AOMEI Partition Assistant has a "Migrate OS" function for users who only wish to move OS to another disk without reinstalling.
Step 1. Install and launch AOMEI Partition Assistant on the disk you wish to transfer, plug the destination disk to this PC, and make sure it can be detected.
Step 2. In the main panel, click "All Tools" and choose "Disk Clone Wizard".

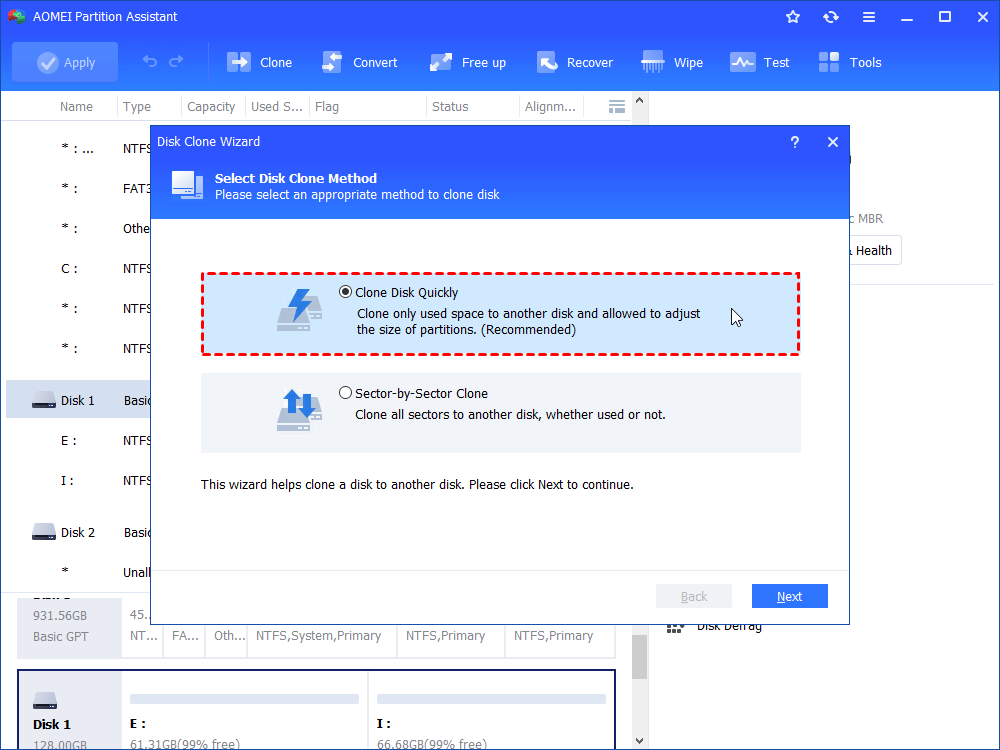
Step 3. Choose a method to clone.
Clone Disk Quickly: Clone only used space to another disk and was allowed to adjust the size of partitions.
Sector-by-Sector Clone: Clone all sectors to another disk, whether used or not.
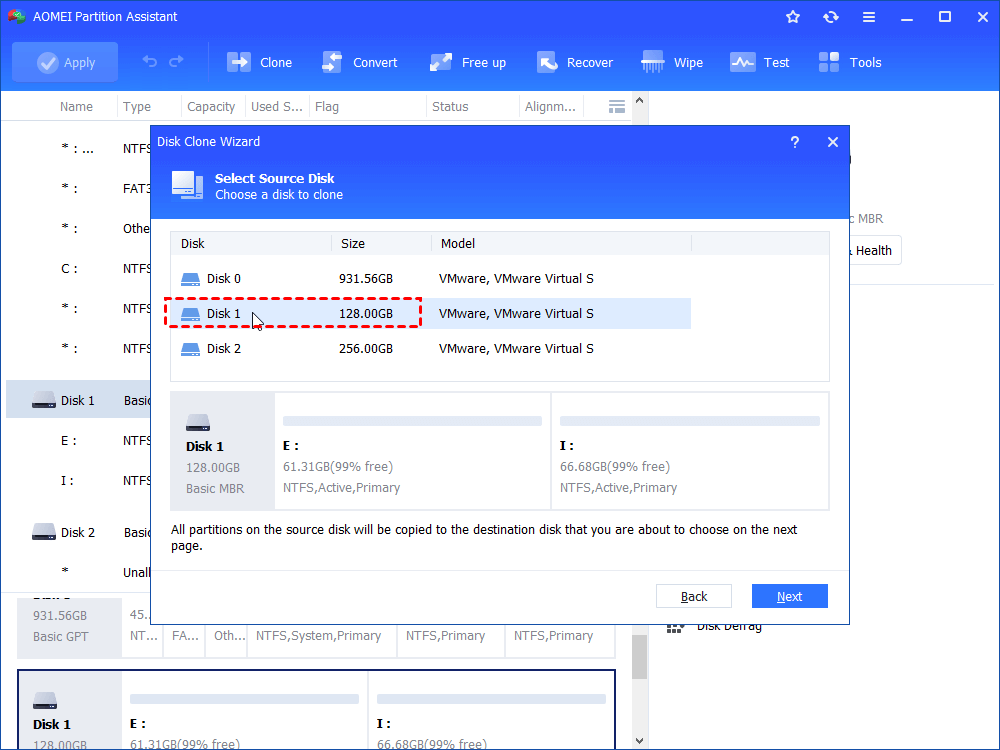
Step 4. In the disk list, choose the source disk which has files and programs you wish to transfer.
Step 5. Select the destination disk.
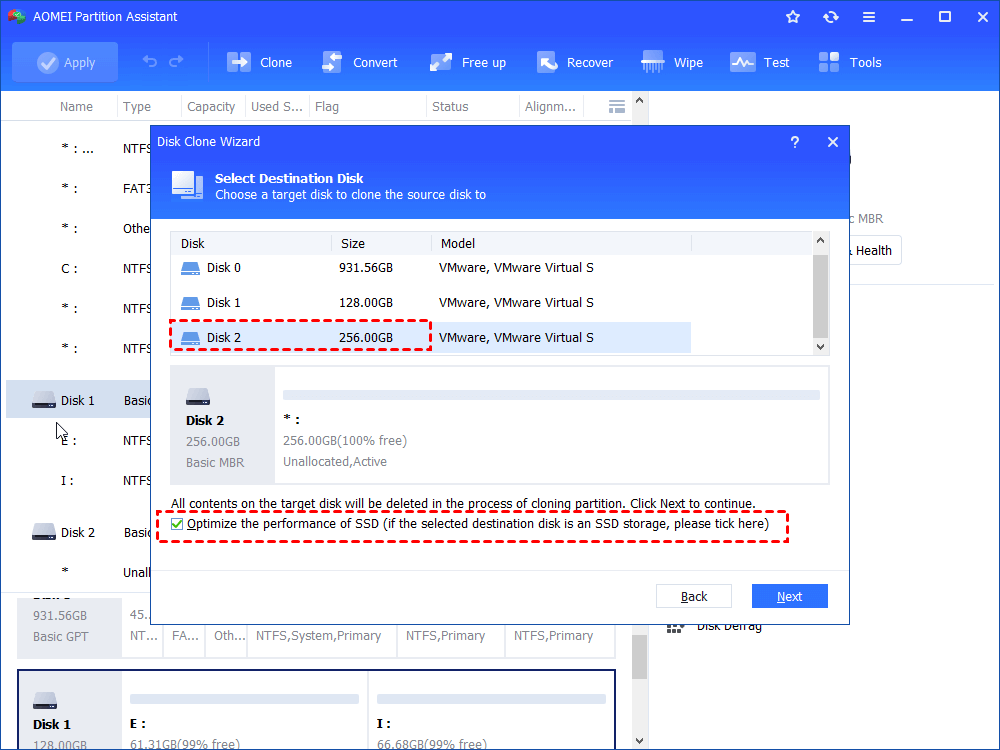
Note: The destination disk should be equal to or larger than the source disk, all the data on the destination disk will be covered by the files on the source disk, so, make sure there is no important data on it. If the destination disk is smaller than the original one, you'll have more details to pay attention to.
Step 5. Clone disk options:
• Clone without resizing partitions: The source disk configuration will be copied on the new disk with the size of the same partition
• Fit partitions to the entire disk: The partitions on the source disk will occupy the entire destination disk
• Edit partition on this disk: You could change the size of the partition on the new disk

Step 6. If you clone the disk that has a system partition, you will receive the following message which guides you on how to boot OS from the destination disk. Click "Finish".

Step 7. Back to the main interface, click "Apply" on the toolbar and click "Proceed" to commit the operations.

Then you can connect the destination disk to another computer to use all files and programs from the original machine.
Further reading – Only transfer programs
There's more service of migration in AOMEI Partition Assistant. If you only need to move some programs from a disk to another disk to run them on another device, this convenient tool can also help you. In the "APP Mover" function, users can migrate installed applications to another drive or another disk without reinstallation. This way won't cover the destination disk or partition. The only thing you might need to pay attention to is to ensure this disk has enough free space to place all programs you wish to move.
Tip: You need to upgrade to the Professional edition for application migration.
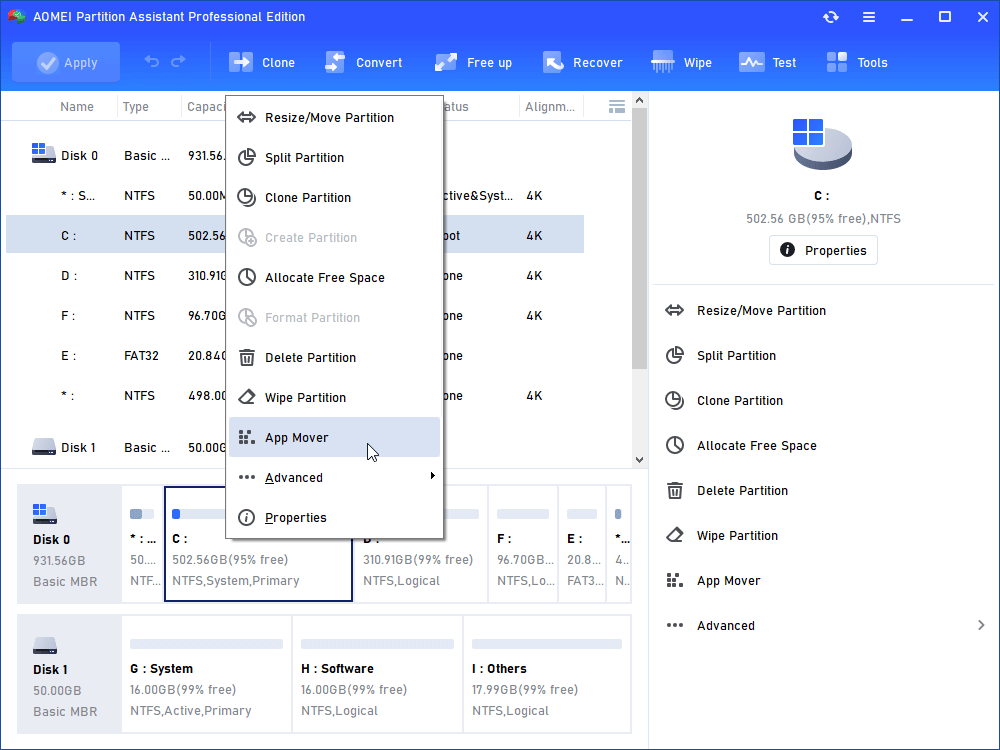
Step 1. Go to "All Tools" > "Other Tools" > "App Mover".
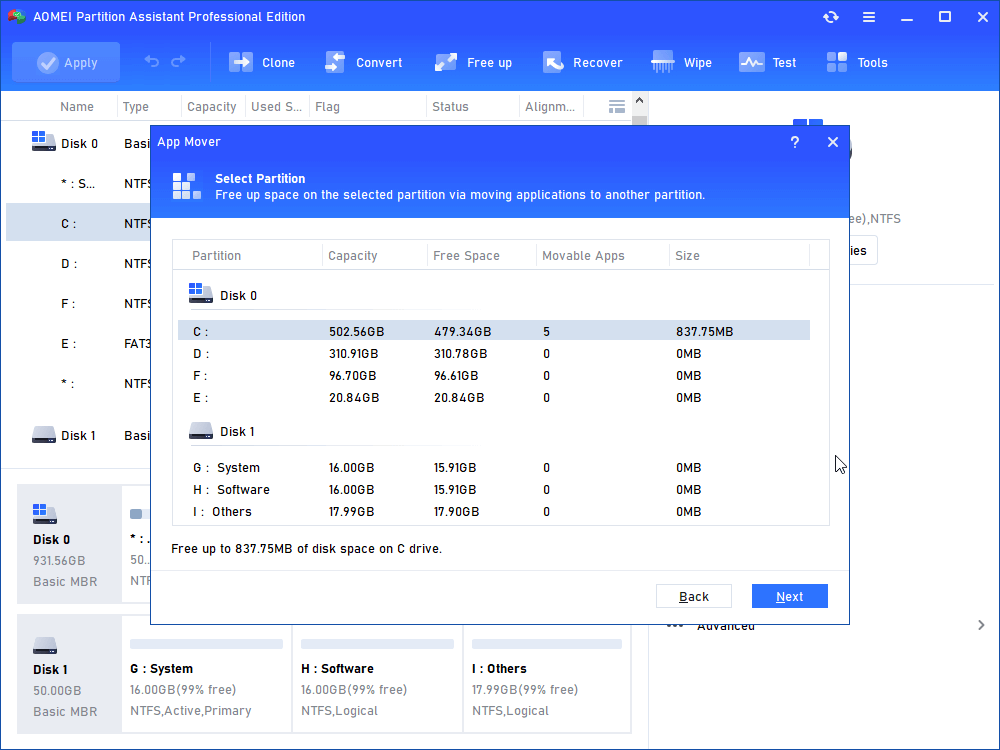
Step 2. All partitions on the PC will appear in the following window where you'll see the available storage space of each partition and the number of movable apps. Hit "Next".
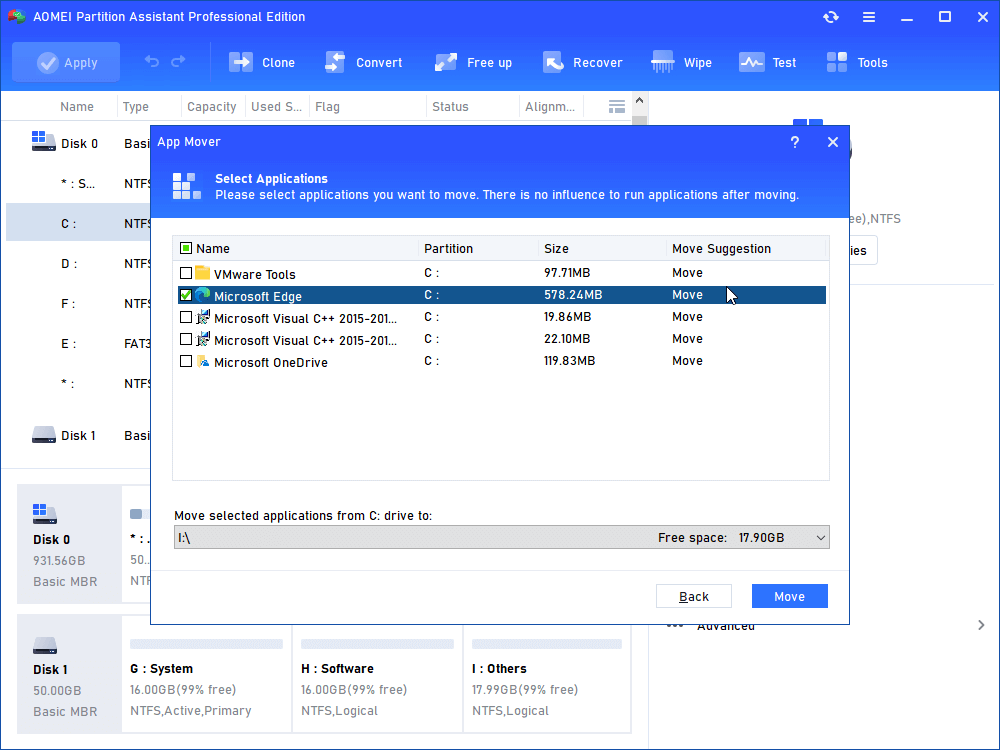
Step 3. All apps in the chosen partition will be listed. Tick the apps you want to move, set target location, and click "Move".
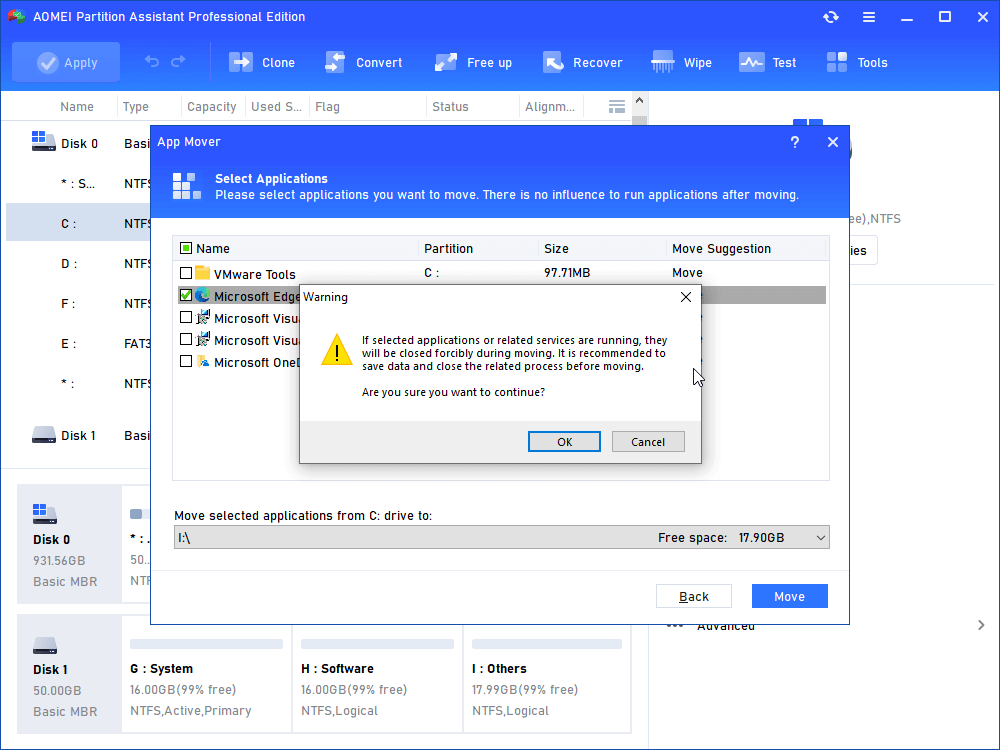
Step 4. When the migration starts, you'll receive a warning from the partition assistant that you'll forcibly close the running applications. Click on "OK" to start the migration.
Wait for a while, when the process is finished, you can plug the destination disk into another device to use all moved programs directly.
Final line
If you're looking for Windows 11 easy transfer, AOMEI Partition Assistant gives you two considerable options. This windows easy transfer download is free and it has many other practical features to help you manage your devices, such as converting MBR to GPT, resizing/deleting/formatting/checking/ partition, rebuilding MBR, allocate free space...
Source: https://www.diskpart.com/windows-11/windows-11-easy-transfer-0725.html
0 Response to "What is a Windows Easy Transfer Cable"
Post a Comment